Convert AI-Generated Markdown Reports into Branded PDFs with VSCode
Convert AI-Generated Markdown Reports into Branded PDFs with VSCode
Why Raw AI Reports Feel… Off
AI has made it incredibly easy to generate reports. In just a few minutes, you can get something that looks reasonably well-structured, which makes it tempting to think: “Why not just export this as a PDF and send it?”
In practice, though, raw AI-generated reports often feel slightly underwhelming to the reader. The issue isn’t the content itself—it’s the lack of context. There’s no clear signal of who created it or how trustworthy it is.
With just a bit of refinement, the exact same content can feel much more credible.
・The “Who Made This?” Problem
When you convert AI-generated Markdown directly into a PDF, you usually end up with an unsigned document. There’s no author name, no company, no service branding, and no logo.
From the reader’s perspective, that raises a simple question: who is responsible for this document?
This becomes especially important in situations like client reports, internal documents, or externally shared analysis. Even if the content is solid, the lack of attribution can reduce its perceived value.
On the flip side, simply adding a logo or brand name in the header or footer can immediately make the document feel more official and trustworthy.
・Why “Too Simple” Hurts Credibility
Another issue is visual design.
AI-generated Markdown is structurally correct, but visually minimal. When converted to PDF as-is, it often uses default fonts, generic spacing, and no layout enhancements.
The result isn’t “clean”—it feels unfinished.
People judge credibility not just by content, but by presentation. A document with a logo, proper spacing, and structured layout feels intentional. One without those elements can look like it was generated and exported without much thought.
What We’re Going to Do
In this guide, the goal is simple: take an AI-generated Markdown file and turn it into a report that’s ready to share as-is.
The key idea here is shifting focus from creating content to presenting it well. The content is already good enough—what matters is how it’s delivered.
・Convert Markdown to PDF
First, we convert the Markdown file into a PDF. With a VSCode extension, this takes just a few clicks. Open the file, run the export command, and you’re done.
At this stage, though, the output is still more like a draft than a polished report.
・Add Branding (Header & Footer)
Next comes the most important step: adding branding.
By placing a logo or brand name in the header and adding company info, URLs, or page numbers in the footer, you give the document identity. It becomes clear who created it and where it came from.
This alone dramatically improves how the document is perceived.
・Make It “Ready to Send”
The end goal is a PDF you can send without hesitation. That means a clean layout, visible branding, and a presentation that feels intentional.
Once you reach this point, the same document can be used for clients, internal sharing, or even public distribution.
Markdown → PDF Extensions for VSCode (Quick Comparison)
There are several VSCode extensions for exporting Markdown to PDF, but what really matters here is the balance between ease of use and customization.
・Best Overall: Markdown PDF (yzane)
For this use case, Markdown PDF is the best fit.
It’s easy to use right away, while still allowing customization through CSS and HTML-based header/footer templates. That makes it especially useful when you want to add logos and branding elements.
・For Heavy Customization: Markdown PDF Plus
If you want more control over design, Markdown PDF Plus is an option. It’s built around custom CSS, which gives you flexibility—but also requires more setup and effort.
・For Professional Typesetting: Pandoc
Pandoc is a powerful alternative if you need high-quality, publication-level PDFs. It uses LaTeX under the hood and supports advanced formatting, but the setup is heavier and often overkill for typical reports.
For this article, we’ll go with Markdown PDF.
Step 1: Install the Markdown PDF Extension
Start by installing Markdown PDF from the VSCode Extensions panel.

Once installed, you can immediately convert Markdown files into PDFs—no additional setup required.
Step 2: Export Markdown to PDF (Default Output)
Before customizing anything, it’s useful to see what the default output looks like.
・Right Click → Export PDF
Open your Markdown file, right-click inside the editor, and select “Export PDF.” That’s all it takes to generate a PDF.
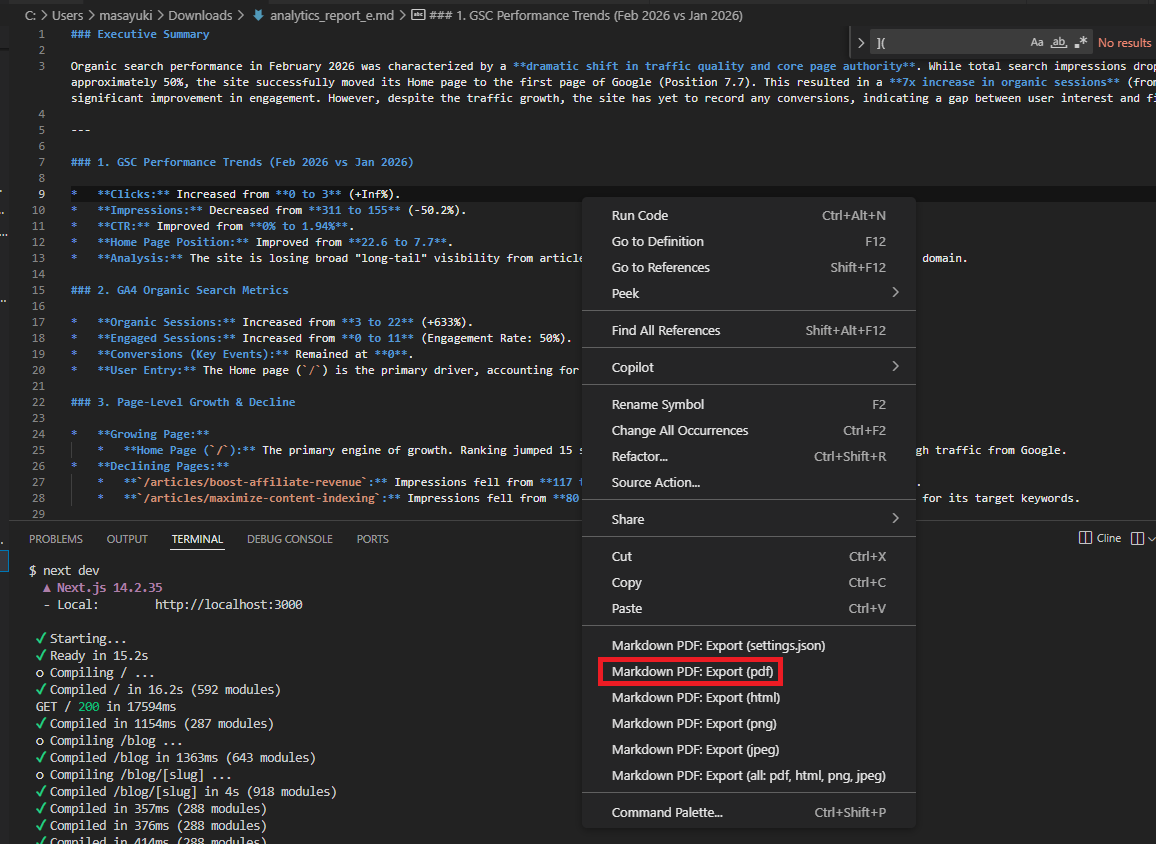
・What’s Missing in the Default Output
The generated file will be clean, but very basic. There’s no header, no footer, no branding, and minimal styling. It works, but it doesn’t feel like something you’d confidently send to a client.
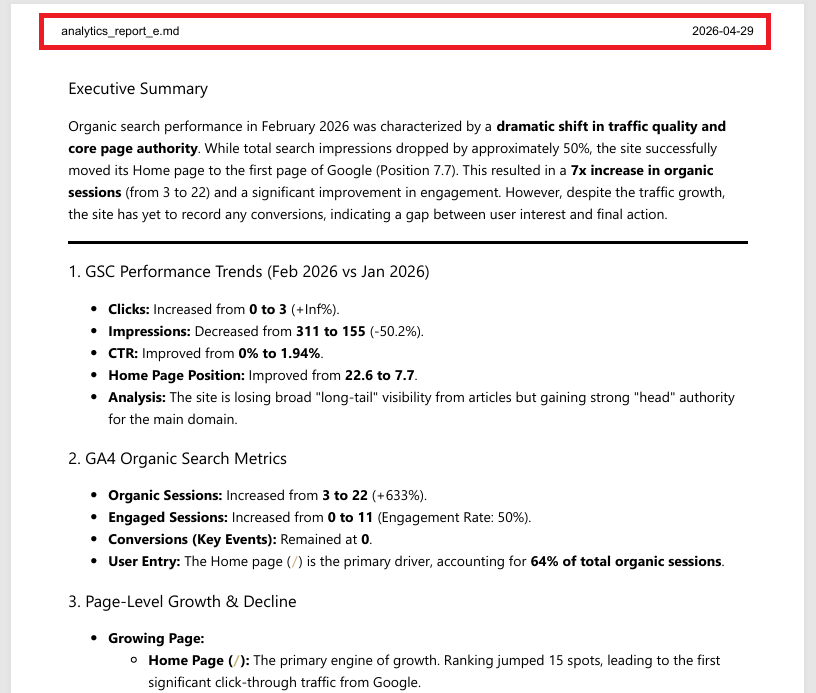
That’s where the next step comes in.
Step 3: Add Branding (This Is the Key Part)
Now we refine the document by adding structure and identity.
・Add Logo & Brand Name to the Header
The header typically includes information such as a logo image, service name/company name, and report title (if necessary).
[Logo] Your Brand Name
Setting this makes it immediately clear "who created the document," instantly giving it an "official" feel and increasing its credibility as a document.
With Markdown PDF, you can freely define the header using HTML, allowing for flexible layouts such as displaying a logo with an <img> tag and placing text with <span> tags.
・Add Company Info & URL to the Footer
Next is the footer. This is where you put "supplementary information."
A common structure looks like this:
- Left: Company name or service name
- Center: Page number
- Right: URL or date
Your Company Name 1 / 10 https://your-site.com
The benefits of including a footer may seem subtle, but they are significant. It improves readability with page numbers, and displays URLs to blogs or products, creating a clear pathway for visitors. Furthermore, it gives the site a more professional, "documentary-like" feel.
Especially for personal projects or blogs, the URLs in the footer become direct advertising space. It may seem inconspicuous, but it's a very effective point for branding.
・Use CSS to Improve the Overall Design
Finally, we'll use CSS to refine the overall appearance. Whether or not you do this is crucial in eliminating the "amateurish" look.
The main points to adjust are:
- Font (readability and overall feel)
- Margins (avoiding overcrowding or excessive spacing)
- Heading (h1, h2, h3) emphasis
- Code block appearance
- Table style
For example, even just these points can make a document look professional:
- Add boldness and margins to headings
- Slightly increase line spacing in the main text
- Add a background color to code blocks
With Markdown PDF, you can specify a custom CSS file, allowing you to create your own style and output with the same design every time. Once you've created the CSS, you can mass-produce "branded PDFs" simply by writing Markdown.
Practical CSS Examples (Copy & Paste)
From here, we'll introduce some CSS that you can actually use.
It's in a format that you can copy and paste directly, so please try applying it once.
As a prerequisite, in Markdown PDF, you can apply styles by specifying a CSS file in settings.json.
"markdown-pdf.styles": [
  "markdown-pdf.css"
]
Create a style.css file in the same directory and write the following content in it.
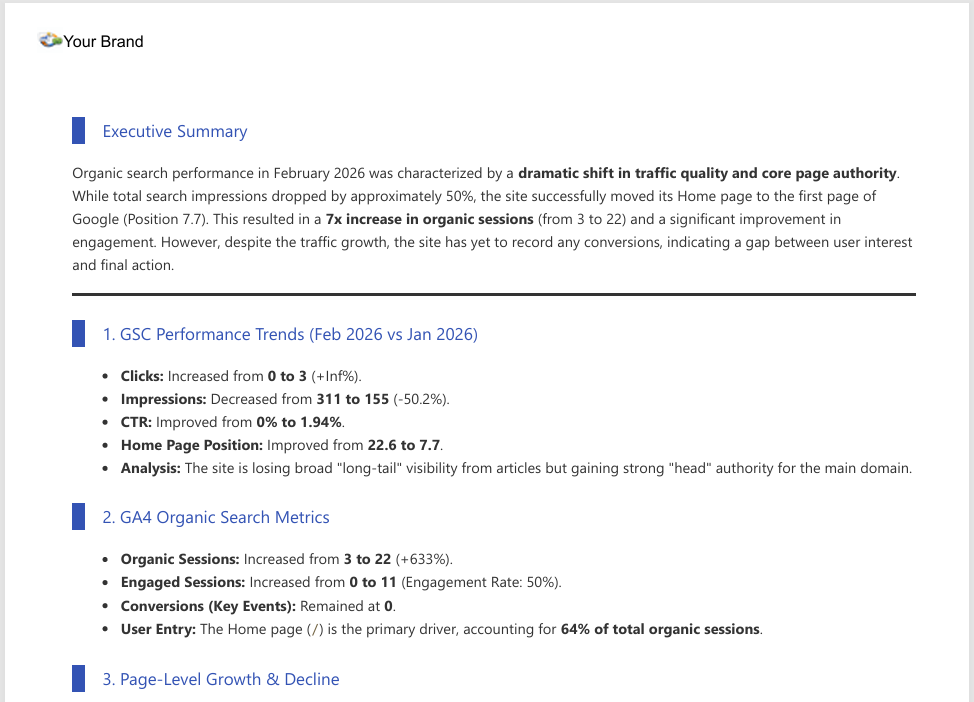
・Header with Logo
Set the header HTML in settings.json.
"markdown-pdf.headerTemplate": "<div style=\"width: 100%; font-size: 10px; padding: 0 20px; display: flex; align-items: center;\"><img alt=\"\" src=\"data:image/png;base64,(...snip...)CYII=\" /><span style-\"font-weight: bold;\">Your Brand</span></div>",
This will display a simple header with:
- Logo on the left
- Brand name on the right
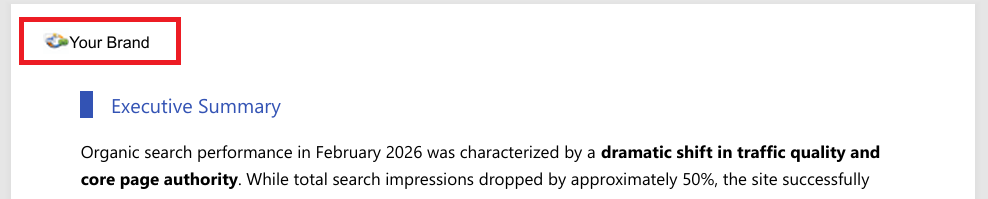
There were two points to be careful about:
- Styles defined in markdown-pdf.css are not applied to the HTML of the header
- The src attribute of the img tag must specify a string that has been base64 encoded with the image data, rather than the path to the file
It took me about 2-3 hours to understand this point.
・Footer with Fixed Text
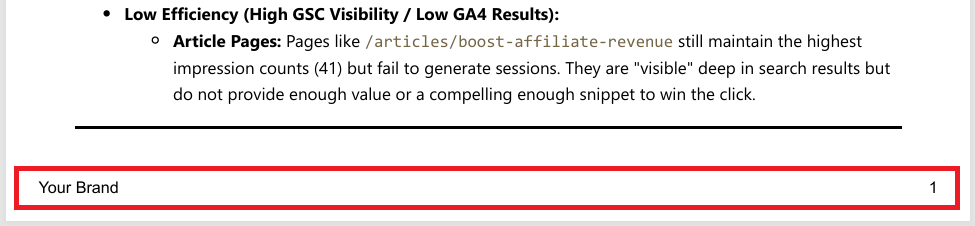
The footer is also controlled using HTML like this.
"markdown-pdf.footerTemplate": "<div style=\"width: 100%; font-size: 10px; padding: 0 20px; display: flex; justify-content: space-between;\"><span>Your Brand</span><span class='pageNumber'></span></div>",
Specifying class='pageNumber' will output the page number.
・Fonts and Spacing
Adjusting font families, line height, and heading spacing makes a huge difference in readability. Even small tweaks here can make the document feel professionally designed.
For example, putting the styles (as below) to markdown-pdf.css:
body {
  font-family: -apple-system, BlinkMacSystemFont, "Segoe UI", Roboto, "Helvetica Neue", Arial, sans-serif;
  font-size: 12px;
  line-height: 1.6;
  padding: 40px;
  color: #333;
}

h1 {
  font-size: 24px;
  margin-bottom: 16px;
}

h2 {
  font-size: 18px;
  margin-top: 32px;
  margin-bottom: 12px;
  border-bottom: 1px solid #eee;
  padding-bottom: 4px;
}

h3 {
  font-size: 14px;
  margin-top: 20px;
  border-left: 10px solid #3454b4;
  padding-left: 15px;
  color: #3454b4;
}

pre {
  background: #f6f8fa;
  padding: 12px;
  border-radius: 6px;
  overflow-x: auto;
}

table {
  border-collapse: collapse;
  width: 100%;
}

th, td {
  border: 1px solid #ddd;
  padding: 8px;
}
Common Pitfalls
There are a few common issues you might run into while setting this up.
・Images Not Showing
This is usually a path issue. Double-check your relative paths and file locations.
・CSS Not Applied
If your styles aren’t showing up, verify the path in your settings file and make sure the CSS file is correctly named and loaded.
・Layout Breaking in PDF
Sometimes the layout looks fine in preview but breaks in PDF. This is often due to page breaks or element widths. You can fix most of these issues with proper CSS rules for pagination.
Conclusion: The Difference Is in the Finish
Creating reports with AI is no longer a differentiator—it’s the baseline.
What actually sets your work apart is how you present it.
By adding branding, refining layout, and making the document feel intentional, you turn raw output into something that carries real value.
AI gives you the material. The final impression depends on how you finish it.
Want to Use This Setup as-Is?
If you’re thinking, “This is useful, but I don’t want to set everything up from scratch,” you’re not alone.
Please check this tool.
AI creates the draft. You create the final product.
Please also check:
- How to Convert Markdown to PDF with Custom Header and Footer
- Markdown to PDF Is Not What You Think (Here’s What Actually Happens)
I will analyze your GA4 and GSC and provide actionable insights
Find why your traffic dropped and get exact fixes.
Fiverr →